


You can add custom buttons to the toolbar in WordPress Gutenberg quite easily, but did you know you can also add format type controls to the format menu?
In this guide we are going to look at how to add a format control using registerFormatType that will allow us to choose the highlight colour of selected text using the semantic <mark> HTML tag.
All of the code used in this tutorial can be found in the free ‘Highlighter’ plugin.
It is worth noting that not only can you apply formats to selected text within your blocks, but you can also use them to insert other objects directly into blocks, such as inline images and icons.
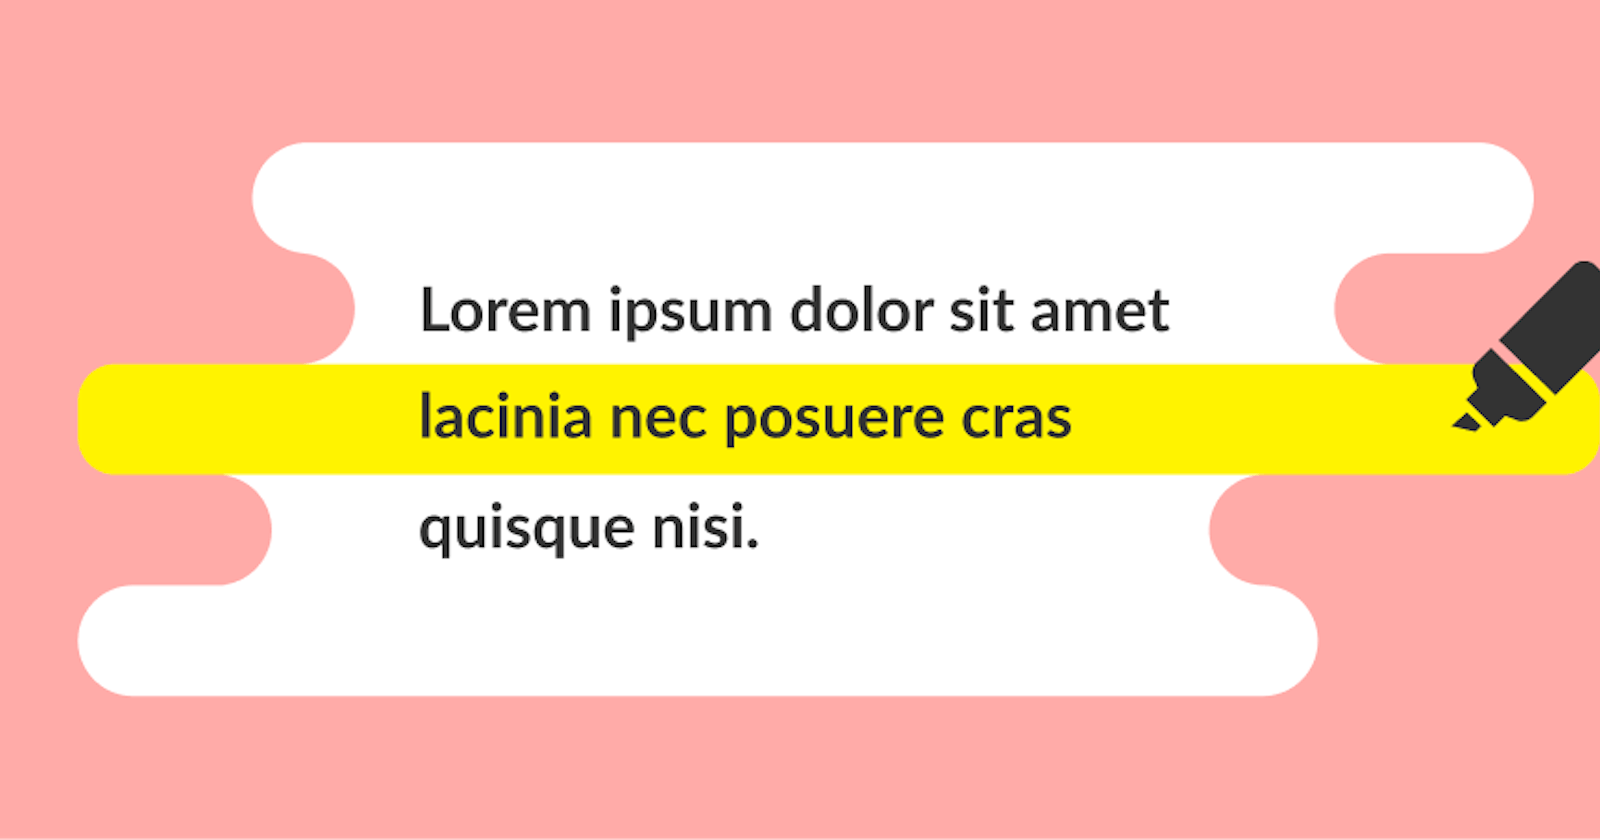
 Applying a format type using the Highlighter plugin.
The video above shows the Highlighter plugin, and our format type in action. Let’s jump to it.
Prerequisites
- Read the Creating a Plugin for the WordPress Block Editor (Gutenberg) guide so you can get a head start in creating the plugin.
- Optionally download the free ‘Highlighter’ plugin, and look at the file
/src/formats/highlight.js
Setup the Plugin Files
If you have followed the prerequisite and followed the plugin guide, we need to go ahead and remove a bunch of those files.
- In the src folder remove everything apart from the
index.jsandstyle.scssfiles. - Delete the contents of the
index.jsandstyle.scsscompletely. - In the
/buildfolder delete all the files. We will regenerate these later. - Remove
block.json. We are not building a block today, so we don’t need this.
Enqueue the Scripts
In the main plugin file (wholesome-plugin.php if you have followed the previous tutorial verbatim) add the following code to enqueue the JavaScript and CSS for your plugin.
<?php
/**
 * Setup
 *
 * @return void
 */
function setup() : void {
    // Load text domain.
    load_plugin_textdomain( 'wholesome-highlighter', false, ROOT_DIR . '\languages' );

    // Enqueue Block Editor Assets.
    add_action( 'enqueue_block_editor_assets', __NAMESPACE__ . '\\enqueue_block_editor_assets', 10 );

    // Enqueue Block Styles for Frontend and Backend.
    add_action( 'enqueue_block_assets', __NAMESPACE__ . '\\enqueue_block_styles', 10 );
}

/**
 * Enqueue Block Editor Assets
 *
 * @throws \Error Warn if asset dependencies do not exist.
 *
 * @return void
 */
function enqueue_block_editor_assets() : void {

    $asset_path = ROOT_DIR . '/build/index.asset.php';

    if ( ! file_exists( $asset_path ) ) {
        throw new \Error(
            esc_html__( 'You need to run `npm start` or `npm run build` in the root of the plugin "wholesome-highlighter" first.', 'wholesome-highlighter' )
        );
    }

    $scripts = '/build/index.js';
    $assets  = include $asset_path;

    wp_enqueue_script(
        PLUGIN_SLUG . '-block-scripts',
        plugins_url( $scripts, ROOT_FILE ),
        $assets['dependencies'],
        $assets['version'],
        false
    );

    wp_set_script_translations(
        PLUGIN_SLUG . '-block-scripts',
        'wholesome-highlighter',
        ROOT_DIR . '\languages'
    );
}
add_action( 'plugins_loaded', __NAMESPACE__ . '\\setup' );

/**
 * Enqueue Block Styles for Frontend and Backend.
 *
 * @return void
 */
function enqueue_block_styles() : void {

    $styles = '/build/style-index.css';

    wp_enqueue_style(
        PLUGIN_SLUG . '-block-styles',
        plugins_url( $styles, ROOT_FILE ),
        array(),
        filemtime( ROOT_DIR . $styles )
    );
}

add_action( 'plugins_loaded', __NAMESPACE__ . '\\setup' );
- Register the Format Type
Open up your /src/index.js file and add the following code.
/**
 * Highlighter.
 *
 * Simple Highlighter that inserts a <mark> into the markup.
 */

// Import WordPress Components.
import { RichTextToolbarButton } from '@wordpress/block-editor';
import { __ } from '@wordpress/i18n';

// Create Highlighter Button.
const HighlighterButton = ( { isActive, onChange, value} ) => {
    return (
        <RichTextToolbarButton
            icon='edit'
            isActive={ isActive }
            title={ __( 'Highlight', 'wholesome-highlighter' ) }
        />
    )
};
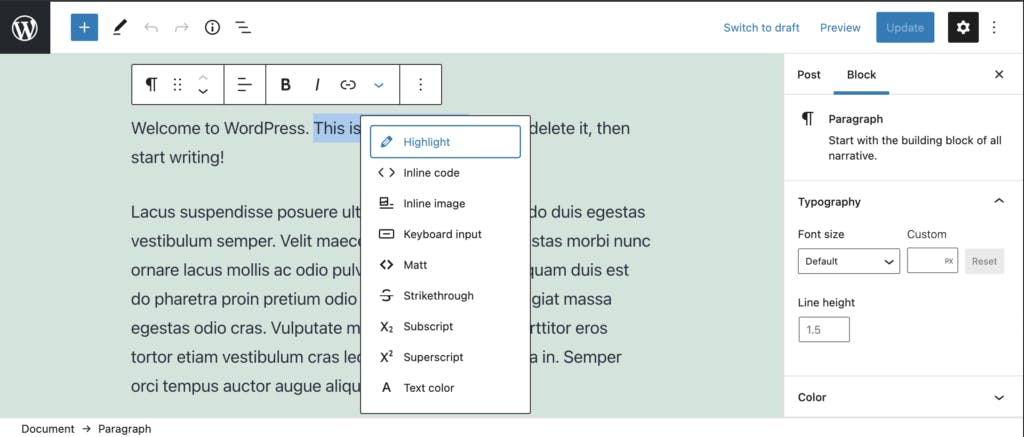
This creates our highlighter button that will appear in the format menu. Now we will use registerFormatType to register the format.
First up, we need to edit our imports to also import registerFormatType from @wordpress/rich-text.
import { registerFormatType, toggleFormat } from '@wordpress/rich-text';
Then register the format by adding in the name of the format (wholesome/highlighter), and passing in an object with the following properties. toggleFormat will be used later for our click event.
className: The class name that will be added to the tag that surrounds the highlighted text.edit: The button that we previously registered.tagName: The type of tag that will be applied to the highlighted text. In this case we are using<mark>which is semantically correct markup for a text highlight.title: The title of the format.
// Register the Format.
registerFormatType(
    'wholesome/highlighter', {
        className: 'wholesome-highlight',
        edit: HighlighterButton,
        tagName: 'mark',
        title: __( 'Highlight', 'wholesome-highlighter' ),
    }
);
Handle the Click
Now that we have added the button to the format menu, all we need to do is handle the click event.
Edit the RichTextToolbarButton and add the onClick event.
<RichTextToolbarButton
  icon='edit'
  isActive={ isActive }
  onClick={ () => {
    onChange(
      toggleFormat( value, {
        type: 'wholesome/highlighter',
      } )
    );
  } }
  title={ __( 'Highlight', 'wholesome-highlighter' ) }
/>
On the trigger we call toggleFormat passing in the value (which is the highlighted text) and pass an object with the type property set to the name of our format.
Now when the button is clicked initially, it will apply the <mark> HTML tag to the selected text, and when clicked again it will toggle the format by removing it again.
To view the code in full, and to view the latest updates have a look at the full /src/formats/highlight.js file within the Highlighter plugin.
Extra: Limit the Format to Certain Block Types
The code above will register the block for all block types. However if you want the block to only appear on certain block types that can be done too.
To do this we will need use the Higher Order Component ifCondition, and useSelect to determine the block type that we have selected.
To do this add the following imports to the top of your file.
import { ifCondition  } from '@wordpress/compose';
import { useSelect } from '@wordpress/data';
Above the registerFormatType block of code, add the following compose block of code.
// Limit the format to the `core/paragraph` block.
var HighlighterButtonContainer = ifCondition( ( props ) => {
    const selectedBlock = useSelect( (select) => select('core/block-editor').getSelectedBlock() );
    return (
        selectedBlock &&
        selectedBlock.name === 'core/paragraph'
    );
} )( HighlighterButton );
As you can see by the code, if the block that is selected is core/paragraph the Higher Order Component ifCondition will return true, and therefore allow the button to render.
All we need to do now is pass the Container we have just created into the registerBlockType code block and our code is finished.
// Register the Format.
registerFormatType(
    'wholesome/highlighter', {
        className: 'wholesome-highlight',
        edit: HighlighterButtonContainer,
        tagName: 'mark',
        title: __( 'Highlight', 'wholesome-highlighter' ),
    }
);
To view the code in full have a look at the /src/formats/highlight-paragraph.js file in the Highlighter plugin.
Extra: Taking it Further
- Take things further by Adding Custom Attributes to your Custom Format with a Modal Popover.
- Add a block sidebar with InspectorControls
- Look at building an options and settings page using Gutenberg components